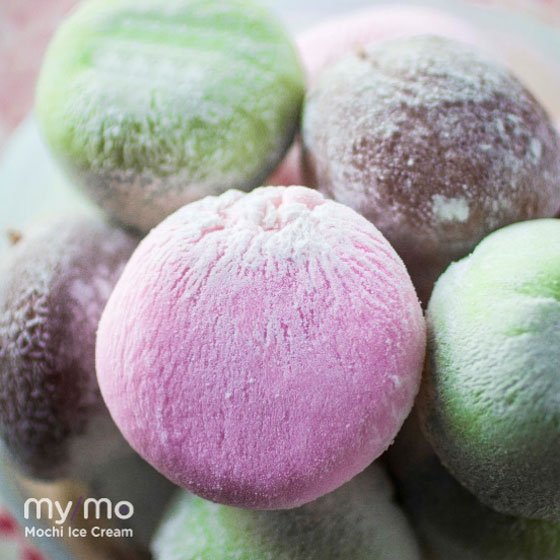
How to Make Mochi Ice Cream – Pillowy, Perfect, Marvelous
By: My/Mochi Ice Cream
Prep/Cook Time: 1 hr prep, 6-8 hrs of refrigeration with 5 mins of cook time
Serving Size: 8 Servings
If you’ve ever wondered how you can make your own mouthboggling mochi ice cream, today is the day! Take this signature mochi ice cream recipe and make it your own with a drop of food coloring! Oh, the sweeeet possibilities.
Ingredients:
- ¾ cup sweet rice (mochiko) flour
- ¾ cup water
- ¾ cup corn starch
- ¼ cup sugar
- Ice cream flavor of your choice!
- Optional: ½ teaspoon of food coloring
Tools:
- Microwave
- 8 aluminum/silicone muffin liners
- Muffin tin
- Large baking sheet
- Medium-sized bowl
- Cookie dough scooper (smaller than an ice cream scooper)
- Rolling pin
- 3.5in (9cm) round cookie cutter
- Plastic wrap
- Parchment paper
- Whisk
- Rubber spatula
Preparation:
- Using the cookie scooper, scoop out the ice cream into the aluminum/silicone muffin liners. Place the muffin pan back into the freezer and wait 3-4 hours or until the ice cream is frozen solid. Snack on some leftover ice cream while you wait.
- Once the ice cream balls are frozen, start making the mochi dough. Combine the rice flour (mochiko) and sugar in a medium bowl and whisk all together. Add water and keep whisking until completely blended.
- Cover your bowl loosely with plastic wrap. Put the bowl in the microwave and heat on high (for a 1200w microwave oven) for 1 minute. Take out the bowl and stir the mochi dough with a wet rubber spatula. Cover again with loose plastic wrap and cook for 1 minute. Stir again, cover, and cook for 30 seconds to finish cooking. The color of the mochi dough should change from white to almost translucent. If you want to add some food coloring, now’s the time to mix it into the dough.
- Place parchment paper down and dust it generously with corn starch. Then pour out the cooked mochi dough on top of the parchment paper. Sprinkle more corn starch on top of the mochi dough, as needed to prevent from sticking.
- Wait for the dough to cool. Once cooled, spread the mochi dough into a thin layer with a rolling pin. Dust the rolling pin and your hands with corn starch before using to flatten out the dough. Use extra corn starch to give yourself that Founding Fathers’ powdered wig look you’ve been wanting to try.
- Transfer the mochi dough with parchment paper onto a large baking sheet and refrigerate for 15 minutes, until firm and cool to touch. Break time! Tik Tok? More snacks? Possibilities are endless.
- Take out the mochi dough and cut out 8 circles with the cookie cutter. Cut. Repeat. Cut. Repeat. Cut. Repeat.
- Place plastic wrap on your work surface, and then put down a circle of mochi dough. Drum roll please….it’s ball dropping time!
- Take an ice cream ball from the freezer and drop onto the mochi dough. Wrap the dough tightly around the ice cream ball. Pinch the corners together to seal. If the mochi dough gets sticky while you are wrapping, powder your hands and mochi balls with additional corn starch. Cover the entire mochi ice cream ball with plastic wrap, seal tightly, and put back into the muffin tin. Repeat for all.
- Place muffin tin with all finished mochi ice cream balls back in the freezer for 3-4 hours. Your cravings will be snackisfied soon.
- Congratulations! You’ve made mochi ice cream at home! Chill. Enjoy. Repeat. Share your new creation with us on Instagram @mymomochiicecream. #adultingcanwait #mouthboggling
